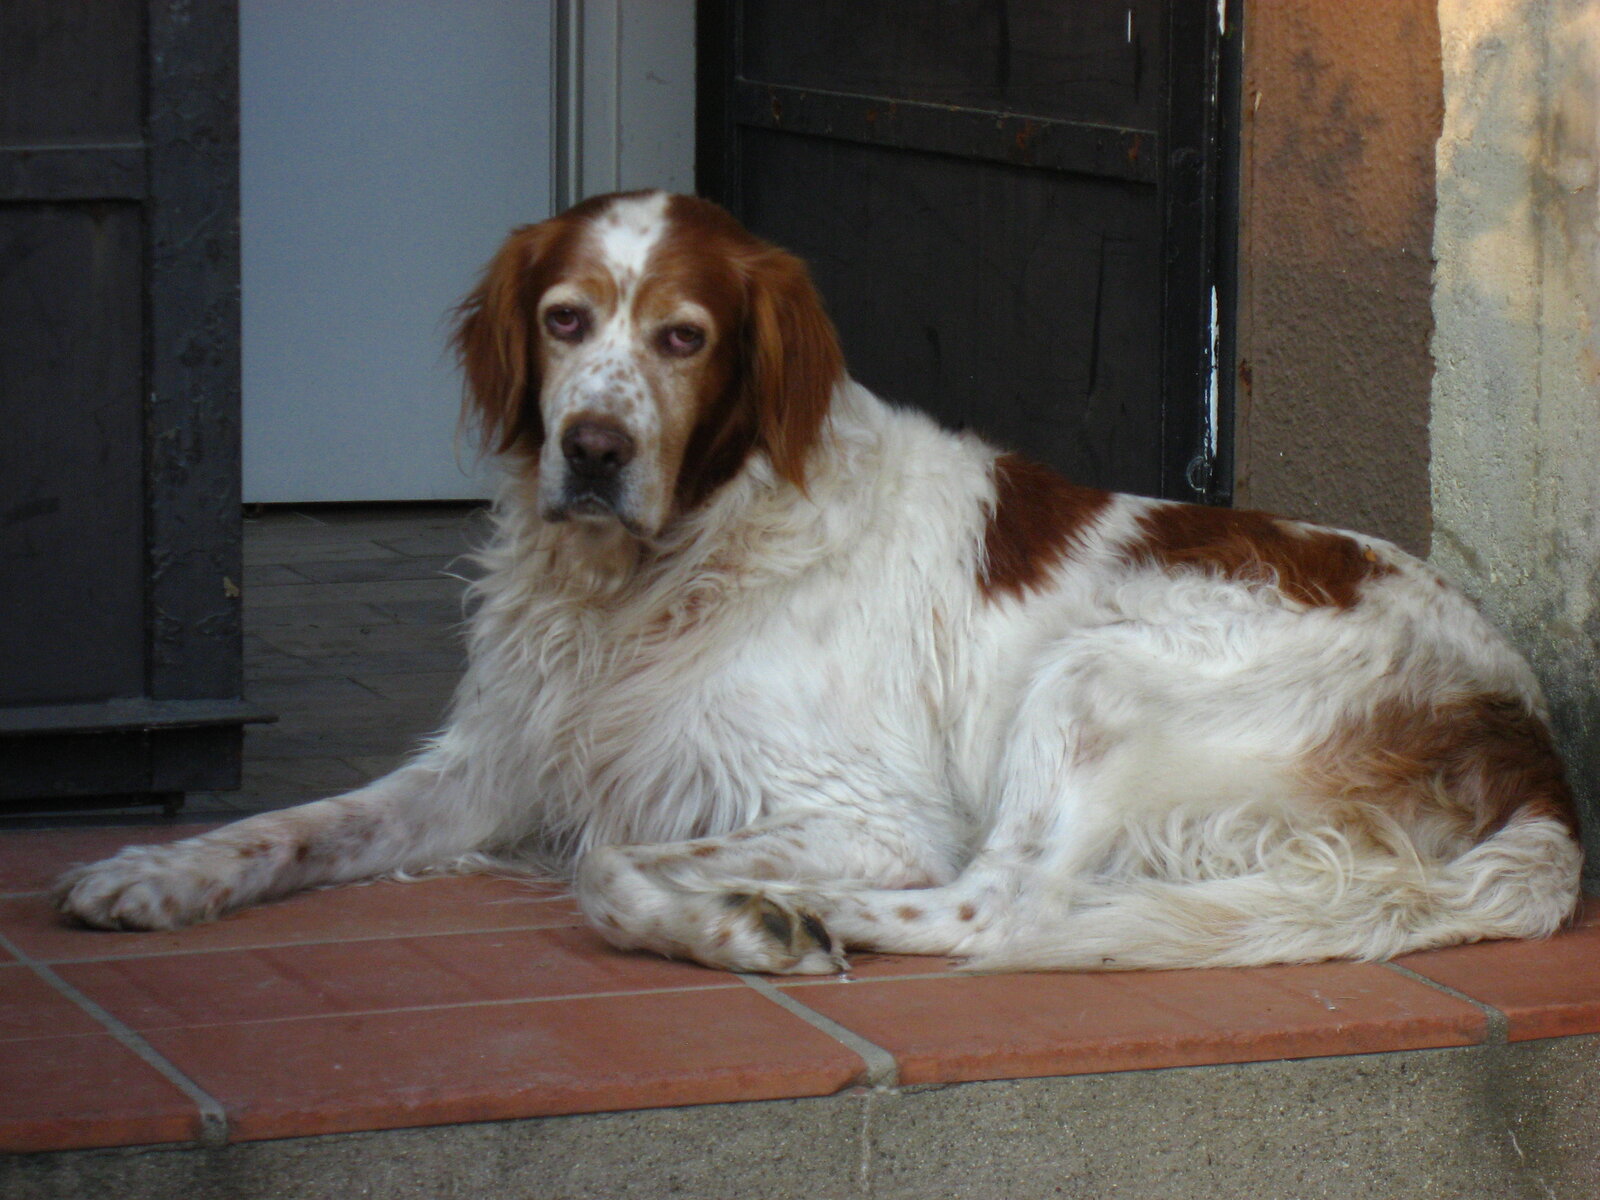
Irish Red & White Setter
Also known as Irish Red & White Setter, Irish Red and White Setter, IRWS
The Irish Red & White Setter is a versatile, athletic sporting dog whose silky red-and-white combination coat needs regular brushing, carding, and professional grooming to stay clean, comfortable, and naturally neat.
Overview
The Irish Red & White Setter is a medium-to-large sporting breed with a soft, silky combination coat in red and white patches. The jacket should lie smoothly over the frame with longer furnishings on the ears, chest, undercarriage, legs, and tail. Closely related to the Irish Setter, this breed shares the same silky-coated sporting grooming approach: regular brushing, carding, and either hand stripping or careful clipper pattern work. Like the Irish Setter, coat color can be affected by clipping — avoid clipping the top of the head when possible. If the body is clipped, follow through consistently on the head with a #7F working with the lay of the coat. The finished groom should leave the dog looking natural: head free of long hair, neat ear tops, smooth front legs, well-feathered rear, flag tail reaching the top of the hock, neat hocks, and natural feet.
Characteristics & Traits
Breed Traits
Physical Traits
Drooling level
Shedding level
Coat grooming frequency
Social & Family
Playfulness level
Adaptability level
Openness to strangers
Watchdog protective nature
Good with other dogs
Good with young children
Affectionate with family
Personality
Energy level
Barking level
Trainability level
Mental stimulation needs
For Pet Parents
The Irish Red & White Setter is a versatile, athletic sporting dog whose silky red-and-white combination coat needs regular brushing, carding, and professional grooming to stay clean, comfortable, and naturally neat.
Grooming Commitment
Distinctive red-and-white coat still needs consistent professional care — same silky setter grooming as the Irish Setter.
The Irish Red & White Setter's natural outline still needs consistent care. Regular brushing and professional carding keep the silky coat clean, comfortable, and mat-free.
- The Irish Red & White Setter's silky coat needs regular brushing and professional care despite the breed's athletic nature.
- Hand stripping preserves the best coat texture, but clipper pet trims followed by carding are a practical alternative.
- All pattern lines should look invisible — a skilled groom makes the finish appear natural.
- The tail should be flag shaped and reach the hock when properly finished.
- Professional grooming every 4–8 weeks supports comfort and coat health.
At-Home Basics
- Difficulty
- moderate_to_high
- Shedding
- Moderate
- Brushing
- 2–4 times per week
- Pro Grooming?
- Yes
- Pro Frequency
- Every 4–8 weeks
Caring for Your Irish Red & White Setter at Home
Brushing feathering & ears
Brush in sections through feathering, undercarriage, and behind the ears.
Chest & thigh brushing
Check thigh, ruff, and tail areas for hidden tangles.
Professional grooming schedule
Schedule professional grooming before matting becomes severe.
Nail trimming
Trim nails between appointments when needed.
Monitor ears
Monitor ears for odor or excessive moisture.
Ownership Profile
- First-time Owner
- Good with commitment
- Alone Time Tolerance
- Low to moderate
- Handling Sensitivity
- Moderate
- Apartment Friendly
- No
- City Friendly
- Yes
Best Suited For
- Active owners who enjoy outdoor exercise and field activity
- Families committed to regular coat maintenance
- Homes that can provide daily activity and companionship
- Owners comfortable with hand stripping, carding, or clipper pattern grooming
- Households seeking a loyal, athletic sporting companion
May Not Suit
- Sedentary households seeking a low-activity dog
- Owners who want minimal brushing between appointments
- Homes unable to accommodate a large, energetic sporting breed
- Owners expecting a low-maintenance silky coat
Mistakes to Avoid
- Brushing only the outer coat without removing compacted undercoat.
When to Call in a Professional
Leave full grooming — bathing, complete drying, deshedding, and any trimming — to a professional groomer every 4–8 weeks. It keeps the coat healthy and comfortable between visits.
History
The Irish Red & White Setter predates the solid red Irish Setter and was the original Irish setter type used for field work in Ireland. The breed nearly disappeared in the 20th century as the solid red Irish Setter gained popularity, but dedicated breeders revived it from a small remaining population. Today the Irish Red & White Setter is recognized as a distinct breed valued for versatility, stamina, and its striking red-and-white coat pattern. Grooming follows the same silky-coated setter techniques used for other setter breeds in the Sporting Group.
Temperament
Balanced, energetic, loyal, and biddable with strong sporting instincts and an even temperament.
Irish Red & White Setter Coat
The Irish Red & White Setter has a dense, soft, silky combination coat with undercoat, marked by red and white patches with clear color definition.
The jacket should lie smoothly over the head, throat, neck, shoulders, back, sides, and thighs, with longer furnishings on the ears, chest, undercarriage, belly, back of the legs, and tail.
The coat should be fresh smelling, light, and shiny when properly groomed, with the natural body jacket tight to the body and no loose hair or tangles.
Grooming follows the same silky-coated setter procedures as the Irish Setter: carding and hand stripping for show quality, or clipper trim and carding for pets using #7F, #5F, #4F, or a #2 guard comb.
- Type
- Silky
- Family
- Combination coat
- Structure
- Double
- Density
- Moderate to high
- Undercoat
- Yes
- Shedding
- Moderate
- Seasonal Change
- Yes
- Matting Risk
- Moderate
- Drying Difficulty
- Moderate
- Water Retention
- Moderate
- Growth Pattern
- Seasonal and continuous
- Breakage Risk
- Low to moderate
Common Problem Areas
Groomer's Guide
Technical reference for professional groomers — specifications and standard operating procedures intended for certified groomers.
Goal: Maintain a fresh, clean, light, and shiny coat with clear red-and-white color definition
Tools Required
- Slicker brush
- Pin brush
- Greyhound comb
- Rubber curry
- Pumice stone
- Carding tools
- Stripping knives
- Professional clippers
- Straight shears
- Curved shears
- Thinning shears
- Small detailing shears
- Dematting tools
- High-velocity dryer
- Nail clippers or grinder
- Ear cleaning solution
- Cotton balls
Pre-Bath Prep
- Trim or grind nails every four to six weeks.
- Clean ears with a mild ear-cleaning solution and document any odor, redness, or discharge.
- Use a rubber curry, shedding blade, pumice stone, carding tool, fine stripping knife, or natural bristle brush to loosen dander and remove loose coat.
- Use a high-velocity dryer over the coat to lift dirt and debris and loosen coat before the bath.
- Line brush in sections to locate tangles before bathing.
- Confirm whether the head, throat, and ears need thinning, stripping, or clipper work.
- Confirm whether whisker removal is requested.
Before Grooming
- Coat density and silky texture
- Undercoat compaction
- Matting in feathering and friction areas
- Whether hand strip or clipper trim is requested
- Ear condition and coat profusion on ear tops
- Nail length and foot coat
- Skin condition
- Whether throat should be trimmed close or left natural
Consultation Notes
- Confirm whether the owner wants hand stripping, carding, or a clipper pet trim.
- Explain that clipper work should leave no visible clipper marks.
- Discuss that longer blades (#7F, #5F, #4F) are preferred over shorter ones for easier blending.
- Ask about home brushing routine and field activity level.
- Check whether whisker removal is requested.
Preparation Objectives
- Remove loose coat before bathing
- Identify mats in feathering
- Confirm trim method with the owner
- Protect skin and plan pattern work
Recommended Actions
- Trim or grind nails every four to six weeks.
- Clean ears with a mild ear-cleaning solution and document any odor, redness, or discharge.
- Use a rubber curry, shedding blade, pumice stone, carding tool, fine stripping knife, or natural bristle brush to loosen dander and remove loose coat.
- Use a high-velocity dryer over the coat to lift dirt and debris and loosen coat before the bath.
- Line brush in sections to locate tangles before bathing.
- Confirm whether the head, throat, and ears need thinning, stripping, or clipper work.
- Confirm whether whisker removal is requested.
Preparation Warnings
- Do not assume surface brushing has cleared the undercoat.
- Do not promise a long natural finish if matting is severe close to the skin.
- Refer persistent ear or skin concerns to a veterinarian.
Objectives
- Clean the coat thoroughly
- Remove odor and debris from feathering
- Prepare the coat for complete drying and finishing
Process
- Follow silky combination coat bathing protocols (refer to book page 69).
- Fully saturate the coat to the skin.
- Use shampoo appropriate for skin and coat condition.
- Rinse thoroughly, especially in chest, leg, and tail feathering.
- Apply conditioner when the coat feels dry or tangled.
- Remove excess water without rubbing feathering into mats.
Product Guidance
- Choose products based on skin sensitivity and coat dryness, not coat color alone.
- Insufficient rinsing can leave residue that irritates skin under dense coat.
- Light conditioning can make combing feathering easier after drying.
Breed Specifics
- Bathe once a week to once every twelve weeks depending on lifestyle.
- Feathering holds moisture — complete drying is essential.
- A damp towel over the muzzle after bathing helps neaten the face when needed.
Drying Objectives
- Dry the coat completely to the skin
- Remove loosened undercoat
- Separate feathering for finishing
- Prepare a smooth surface for carding, stripping, or clipper work
Drying Methods
- High-velocity drying in sections
- Line brushing during drying
- Comb check after the coat is fully dry
Drying — Breed Specifics
- Pay extra attention to behind the ears, the ruff, thigh area, undercarriage, and tail.
- Do not begin trimming until the coat is completely dry and cool to the skin.
- Check for density inconsistencies by hand after drying.
Drying Quality Standard
The coat should be fully dry, loose undercoat removed, and combable through all feathering before detail work begins.
Techniques
- Bath and brush
- Deshedding
- Carding
- Hand stripping
- Bulk thinning
- Clipper trim for pet maintenance
- Thinning shear finish
Common Trims
- Hand Strip and Card Finish
- Clipper Pet Trim
- Light Maintenance Trim
Clipper Areas
- Pet body pattern with #7F, #5F, #4F, or guard combs
- Head top with #7F only when body is also being clipped — coat color changes dramatically
- Throat trimming with #10 or #15 inside the cowlick line
- Ear top trimming with #10 or #15, or thinning on light-coated dogs
- Sanitary trimming
- Pad trimming with #10
Scissor Areas
- Ears
- Feet
- Hocks
- Flag tail
- Thigh bulk thinning
- Body blending
- Undercarriage arch
Scissoring — Primary Areas
- Ears
- Feet
- Hocks
- Flag tail
- Thigh bulk thinning
- Body blending
- Undercarriage arch
Scissoring — Finish Goals
- Neat natural outline
- No visible scissor or clipper lines
- Ear tops clipped or thinned with soft blending line
- Rounded neat bottom ear feathering
- Flag-shaped tail reaching the hock
- Invisible pattern transitions
Scissoring — Breed Specifics
- Bulk thin the thigh area to accentuate muscle while leaving furnishings on the back of the thighs.
- Neaten the undercarriage into a soft arch — highest point directly below the last rib.
- Shape the flag tail naturally with thinning shears — pointed tip reaches the hock.
- Slide thinning shears up under the coat with the smooth blade against the skin to avoid pinching.
- The front of the front leg and chest should be treated as separate areas.
Clipper Work — Common Uses
- Pet body pattern with #7F, #5F, #4F, or guard combs
- Head top with #7F only when body is also being clipped — coat color changes dramatically
- Throat trimming with #10 or #15 inside the cowlick line
- Ear top trimming with #10 or #15, or thinning on light-coated dogs
- Sanitary trimming
- Pad trimming with #10
Clipper Safety Notes
- It is not recommended to clip the top of the head even on pets because the coat can change color dramatically.
- If clipping the body, follow through with clipping the top of the head using a #7F working with the lay of the coat.
- Do not clip inside the ear leather on Irish Red & White Setters — leave the top front edge untrimmed to help create a soft expression.
- Always trim pads with a #10 blade.
- Longer body blades are preferred over shorter ones for easier blending into furnishings.
Equipment
- #10 blade for pads
- #10 or #15 blades for throat and ear tops
- #7F blade for head top when body is clipped
- #7F, #5F, #4F for body pattern
- #2, #1.5, and #1 guard combs
- Thinning shears for blending
Blade & Length Selection
- Owner preference for hand strip vs clipper trim
- Coat density — light-coated dogs may need thinning rather than clipping on ears
- Coat color sensitivity — clipping can dramatically change red coat appearance
- Skin sensitivity
- Need to blend pattern lines invisibly into furnishings
Common Pet Trim Styles
- Hand Strip and Card Finish — The traditional presentation using hand stripping, carding, and bulk thinning to maintain proper coat texture, color definition, and natural outline.
- Clipper Pet Trim — A clipper body pattern using #7F, #5F, #4F, or guard combs followed by carding, with neat ear tops, feet, hocks, and flag tail.
- Light Maintenance Trim — A bath, deshed, card, and light neatening that preserves maximum coat length and color definition while keeping the dog clean and tangle-free.
Style Selection Factors
- Owner preference for hand strip vs clipper
- Coat density
- Color pattern preservation
- Home brushing frequency
- Field activity level
Head
Keep coat on the head lying smoothly and free of long strays Conform fine short hair to the shape of the skull Maintain a noble, natural expression Trim the throat close with a #10 or #15, or leave natural on light-coated pets — stay inside the cowlick line, stopping about two to three finger widths above the breast bone
Clipping the top of the head causing dramatic coat color change Over-clipping and losing breed character Visible transitions at the cowlick seam
Ears
Clip top 1/3 of ear leather or to the jawline if ears are very long with a #10 or #15 blade, creating a soft dip at the blending line. Or thinning shear the top of the ear if the dog is very light coated. Neaten bottom of ear feathering so it is rounded and neat. Do not clip inside the ear leather. Leave the top front edge untrimmed to help create a soft expression.
Do not diagnose or treat suspected ear infection. Refer odor, discharge, redness, swelling, or pain to a veterinarian. Always keep the tips of the shears toward the tips of the ears when edging for safety. Do not clip inside the ear leather on Irish Red & White Setters.
Feet
Trim pads with a #10 blade using a very light touch. If there is long fur between the toes, back-brush the fur so it stands up on top of and away from the foot. With thinning shears, trim off the excess to create a neat, natural-looking foot. Tidy the outside edge of the foot with small detailing shears if needed. If hocks have longer coat, trim lightly with thinning shears. A #4F blade used carefully in reverse works well for tops of feet and hocks on some dogs. Trim nails short or grind for healthy foot structure.
Debris trapped between toes after field work Over-trimming pads and causing irritation
Tail
Shape the tail like a triangular flag — pointed tip reaches the top of the hock. Cover the top with short, smooth harsh coat while long silky feathers fall from the underside. Create a break in the fur at the root base separating tail from body. Shape naturally with thinning shears or shears.
Sanitary Area
Neaten the undercarriage into a soft arch — highest point directly below the last rib Remove only the coat needed for hygiene Blend naturally into surrounding feathering
ears
highMaintenance
- -Clip top 1/3 of ear leather or to the jawline if ears are very long with a #10 or #15 blade, creating a soft dip at the blending line.
- -Or thinning shear the top of the ear if the dog is very light coated.
- -Neaten bottom of ear feathering so it is rounded and neat.
- -Do not clip inside the ear leather.
- -Leave the top front edge untrimmed to help create a soft expression.
Styles
- -Top 1/3 clipped or thinned on light-coated dogs
- -Bottom feathering rounded and neat
- -Top front edge left untrimmed for soft expression
Risks & Warnings
- -Do not diagnose or treat suspected ear infection.
- -Refer odor, discharge, redness, swelling, or pain to a veterinarian.
- -Always keep the tips of the shears toward the tips of the ears when edging for safety.
- -Do not clip inside the ear leather on Irish Red & White Setters.
feet
highMaintenance
- -Trim pads with a #10 blade using a very light touch.
- -If there is long fur between the toes, back-brush the fur so it stands up on top of and away from the foot.
- -With thinning shears, trim off the excess to create a neat, natural-looking foot.
- -Tidy the outside edge of the foot with small detailing shears if needed.
- -If hocks have longer coat, trim lightly with thinning shears. A #4F blade used carefully in reverse works well for tops of feet and hocks on some dogs.
- -Trim nails short or grind for healthy foot structure.
Styles
- -Natural neat feet
- -Lightly beveled feet with thinning shears or #4F in reverse
Risks & Warnings
- -Debris trapped between toes after field work
- -Over-trimming pads and causing irritation
head
highGoals
- -Keep coat on the head lying smoothly and free of long strays
- -Conform fine short hair to the shape of the skull
- -Maintain a noble, natural expression
- -Trim the throat close with a #10 or #15, or leave natural on light-coated pets — stay inside the cowlick line, stopping about two to three finger widths above the breast bone
Styles
- -Natural smooth head with finger plucking, carding, and thinning
- -Avoid clipping top of head — if body is clipped, use #7F on head with lay of coat
Risks & Warnings
- -Clipping the top of the head causing dramatic coat color change
- -Over-clipping and losing breed character
- -Visible transitions at the cowlick seam
tail
highGoals
- -Shape the tail like a triangular flag — pointed tip reaches the top of the hock.
- -Cover the top with short, smooth harsh coat while long silky feathers fall from the underside.
- -Create a break in the fur at the root base separating tail from body.
- -Shape naturally with thinning shears or shears.
Styles
- -Flag-shaped tail reaching the top of the hock
sanitary Area
moderateGoals
- -Neaten the undercarriage into a soft arch — highest point directly below the last rib
- -Remove only the coat needed for hygiene
- -Blend naturally into surrounding feathering
High-Risk Areas
- Behind the ears
- Around the ruff
- Thigh area
- Undercarriage
- Tail
- Between the toes
- Ear feathering
- Chest feathering
- Rear leg feathering
Challenges
- Blending clipper body patterns invisibly into furnishings
- Owner requests for clipper cuts when a natural finish is preferred
- Seasonal undercoat compaction
- Incomplete drying in dense feathering
- Cross-grain thinning creating irreparable coat holes
- Leaving visible clipper tracks when a seamless natural finish is expected.
- Cutting cross-grain with thinning shears, creating holes in the coat.
- Beginning detail work while feathering is still damp.
- Using blades other than #10 for pad trimming.
- Using blades that are too short, making it impossible to blend into furnishings invisibly.
Management Principles
- Prefer longer blades over shorter ones for easier blending.
- Card after clipping to restore texture.
- Use bulk thinning with moderately toothed single-sided thinning shears.
- Work methodically — four to six cuts per area, then brush out before continuing.
- Never cut cross-grain with thinning shears.
Pro Tips
- Avoid clipping the top of the head — the coat can change color dramatically on Irish Red & White Setters.
- If the body is clipped, follow through with a #7F on the head working with the lay of the coat.
- Do not clip inside the ear leather — leave the top front edge for a soft expression.
- Prefer #7F, #5F, or #4F over shorter blades for body pattern blending.
- Card the coat after any clipper body work.
- Trim pads with a #10 blade.
- Bulk thin thighs but leave furnishings on the back of the thighs.
- Shape the flag tail to reach the top of the hock.
Assessment Priority
Preserve clear color definition and a natural athletic outline with a flag tail
Ready to book your Irish Red & White Setter's grooming session?
Connect with a Buddyz professional to schedule online in minutes.
Not the right match?
Continue exploring our directory to find the perfect breed for your lifestyle.
Are you a professional?
Use Buddyz to manage your salon, understand complex coats, and educate pet parents.